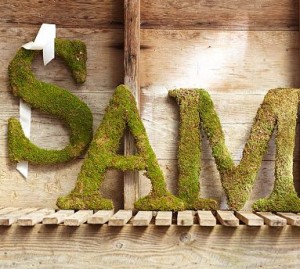
My Very Own Moss Covered Letter
I really wish I were crafty and original but “I yam what I yam”. (Now why did Popeye spring up in my memory? 
Felt So Cute was where I saw a tutorial for how to make these cute moss covered letters. I spotted this tutorial “Games to Go” on her site. What a totally cute project.
Now if you really don’t want to make this lovely little letter yourself, just head on over to Pottery Barn where you can purchase one already made to the tune of $79. Ouch!
If you are happy to be a DIY’er, let me just tell you that it will cost you less than $10. Here is what I made. My hubby thinks it looks rather “furry”. I think that was his word. But I like it.

To make this you’ll need the following:
Styrofoam or a wooden letter of your choice
moss
ribbon
utility knife
glue gun
Only a few things. That’s good!
Step 1: I had a wooden letter W and I traced that onto styrofoam.

I haven’t lost anybody, right? This is easy, no?

Step 3: Take the moss and hot glue it onto the letter. Watch those fingers!

Step 4: Completely cover the letter, filling in any white spots that show through. 
Step 5: Hot glue some ribbon to the back, making a loop.

I’m linking up with Blue Cricket Design’s Show N Tell Party & Not Just a Housewife where you will find plenty of other project inspiration. Check it out.


2 Comments
Joane
Great idea! Maybe you could trim around the edges so it’s NOT so…. furry Haven’t tried it myself, so I don’t know if that would work or not.
Pingback: